Making a Headjoint – A Fusion of Science and Art
by Lindsey McChord
As a headjoint maker, I’m often asked by flute players what goes into making a headjoint; the tools used, the techniques involved and how the headjoint components are made. They also wonder why their headjoint plays the way it does, and what aspects of the overall design affect how the headjoint plays. They wonder why there are so many headjoint variations, and why some work well for them while some aren’t a good fit. Since this is a topic that comes up often I’d like to answer these questions by outlining the production process I use to make my headjoints. Then, I’d like to explore the many ways the lip plate and riser influence the sound and feel of the headjoint. Every headjoint I make in my shop is cut in the same way using the same parts, but each one has a special character that comes to life during the cutting process making each one truly one of a kind.
After spending nearly 10 years at Verne Q. Powell Flutes designing and cutting headjoints, I decided to form my own company in order to work more closely with customers and explore the many headjoint design ideas I had. In my experience, the headjoint is the most mysterious part of the flute. Consisting of just a tube, riser, lip plate, and crown, the headjoint doesn’t have any moving parts or complicated mechanisms. Despite this simplicity it remains one of the most complicated parts of the flute to manufacture, requiring a careful hand and a great ear to get it right.
With a great headjoint you can fly – articulation is easy and response is immediate and even through the entire range of the flute. With a not so great headjoint you can find yourself struggling to sound the way you want and ultimately second guessing your playing ability. In order to explore how the lip plate and riser influence the sound and feel of the headjoint, first we should go through the basic anatomy and production process of making a headjoint blank.
Anatomy of a Headjoint
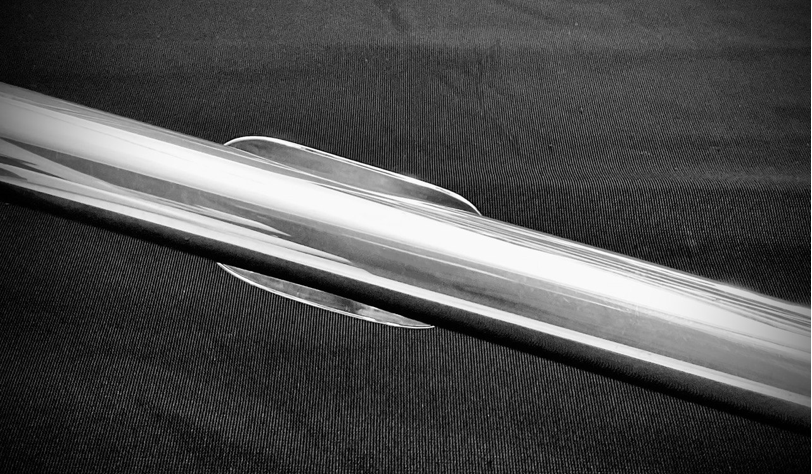
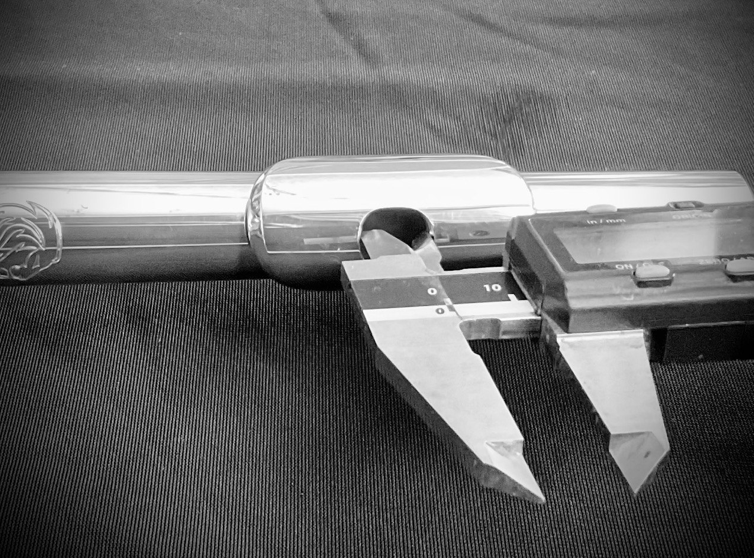
THE TUBE 
The tube is the foundation of the headjoint. Usually made of silver or gold, the headjoint tube can also be made out of other metals, composite materials and even several varieties of wood. Each material used for the tube adds a unique character to the headjoint.
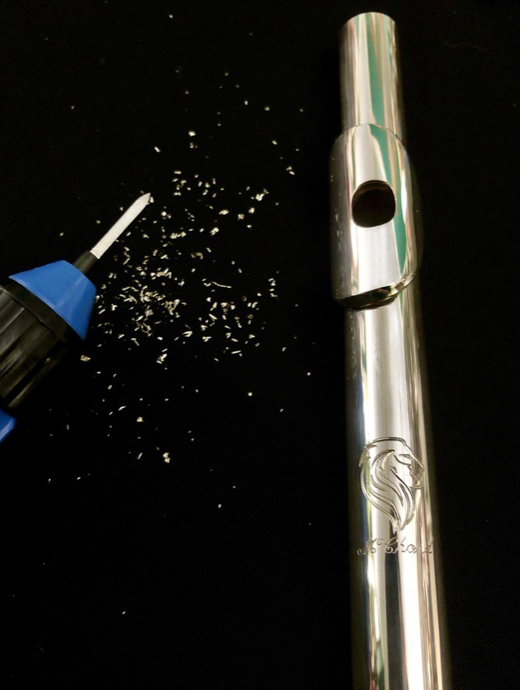
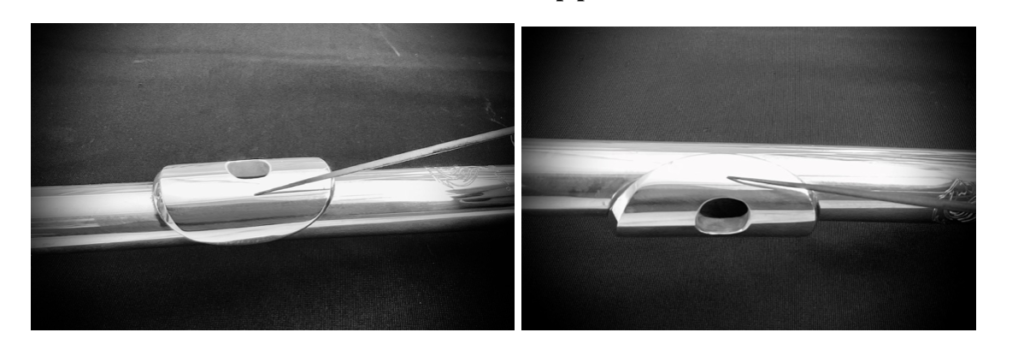
Drawn to a precise taper, the headjoint tube must conform to a strict set of measurements in order to function properly in tune. The tube is drawn using an arbor press that forms it into a tapered shape. The tube is drawn a few times in order to get to the desired shape. The tube is then cut to length, the location of the embouchure hole is sighted and the tube is cleaned and polished.
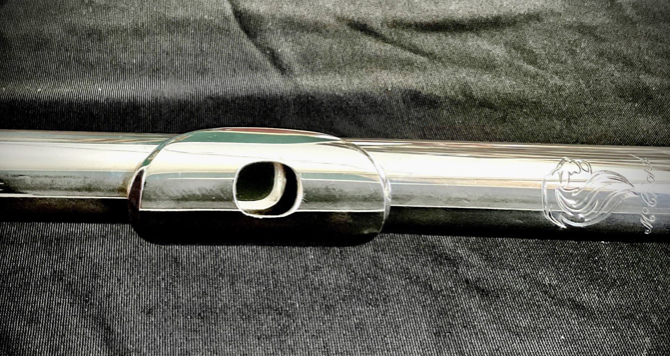
THE LIP PLATE
The lip plate is one of the main balance points of the flute; it controls the angle of the airstream as well as how the headjoint feels to be played. Lip plates can come in a variety of shapes, sizes and materials.
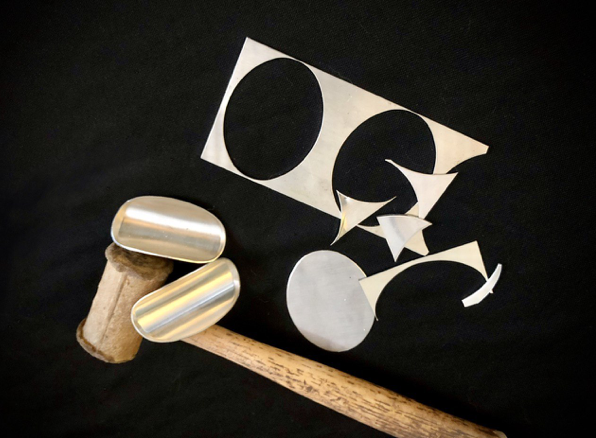
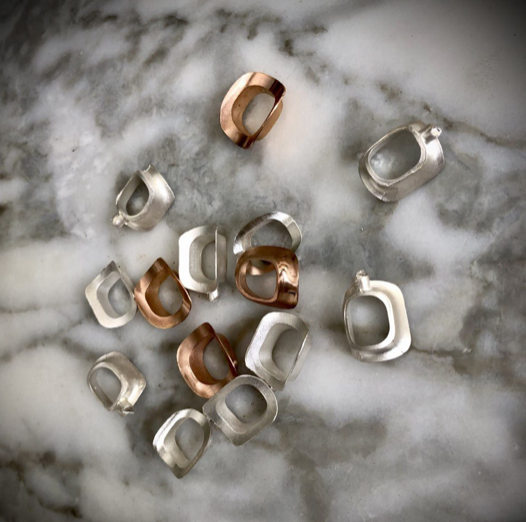
The lip plate is punched and formed, cast by a jeweler, or shaped by hand using a metal die and a rawhide hammer. The lip plate can be made in various shapes and sizes to accommodate the individual preferences of each flutist. The shape can be customized by bending and shaping the lip plate using a vise, rawhide hammer, a series of files and other tools to get to the desired contours and overall shape. Once formed to the final shape, it is filed and sanded, then polished to a high shine. It is now ready to be soldered to the riser.
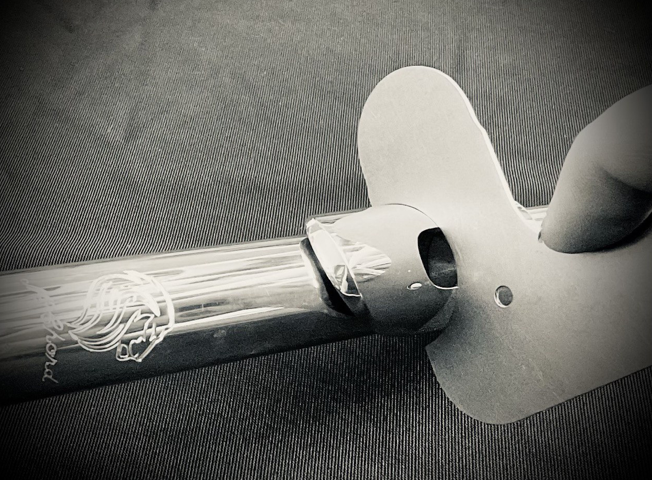
THE RISER
The riser is perhaps the most complicated piece of the headjoint, because it is responsible for so much of how the headjoint functions. Every aspect of the riser impacts how the headjoint plays, from the overcutting, undercutting, angles and shapes of the front, back and side walls, as well as the overall height and width. Much of the inside of the riser is difficult to reach, difficult to see and difficult to measure after assembly, so much of the cutting and shaping process that is done after assembly has to be done with great care, removing only a small amount of material at a time.
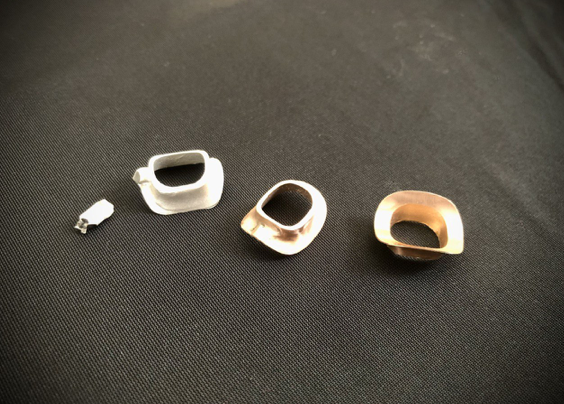
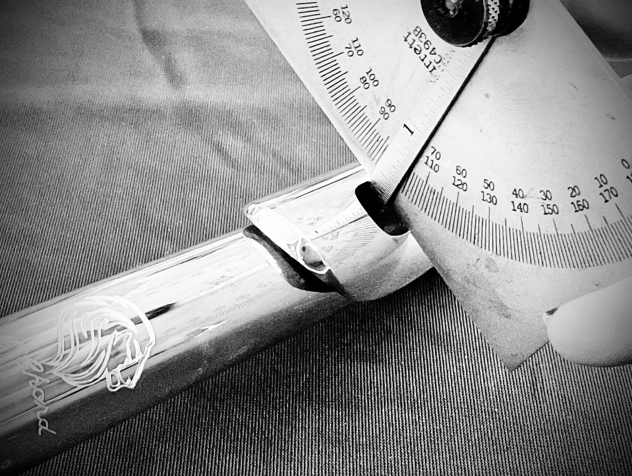
The riser is typically cast, a process of pouring liquid metal into a mold to produce a metal piece. Casting is fast and precise, with less variation between pieces. A riser that has been cast has a sprue (a leftover piece from the casting process) that needs to be trimmed and then sanded down. Using nippers to cut it and then an abrasive wheel to blend it away, the sprue is removed and the riser is carefully sanded and shined so that it is a consistent patina. The top and bottom are carefully shaped on the lathe to form a clean, flat surface for soldering. The riser is now ready to be soldered to the lip plate.
THE CROWN
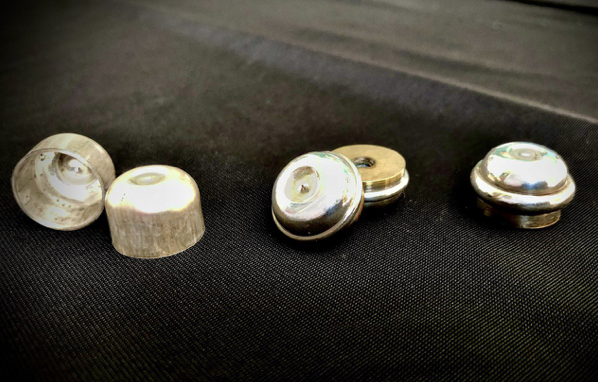
The crown can be replaced or swapped out to change the feel, sound and balance of the entire flute. The crown screws down onto the cork assembly to close off the dead end of the headjoint tube and keeps the cork assembly in place.
Crowns are manufactured several ways; they can be cast, 3D printed, or formed using a die. In the example picture above, the crown was formed in a press using a die. The resulting piece is cut to length and then soldered over a brass base plate. A delicate ring is then press fit over the top to add a bit of weight and elegance. Crowns with a metal interior are known as “filled” and others with an empty interior are known as “hollow” crowns. Filled crowns provide a surface to reflect the sound off of, while the hollow crown provides a resonant space. Once assembled, it is carefully polished and ready to go.
Now that we’ve explored the parts of the headjoint and gone over general methods of how to make them, it’s time to explore the two most influential parts of the headjoint – the lip plate and the riser. Every detail with these makes a difference - the tiniest bit of material cut away, littlest adjustment to an angle or even the smallest sweep of sandpaper will alter the sound in ways that can completely change the way the headjoint feels, sounds and responds.
The Lip Plate and Riser- Where the Magic Happens
THE LIP PLATE
The shape of the lip plate may seem unrelated to how the sound is produced but if we look more closely we can see how much of an affect it truly has. There are three lip plate characteristics to explore that are crucial to the design – the distance between the lip plate and tube, the length of the front and back of the lip plate and the shape/contour of the lip plate.
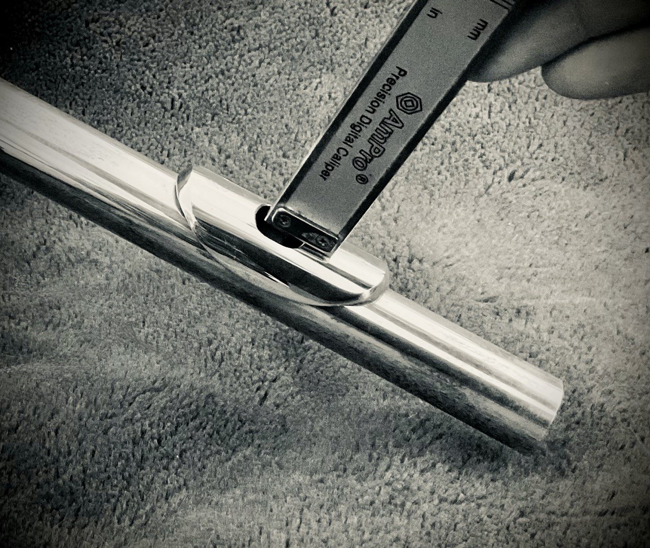
DISTANCE BETWEEN LIP PLATE AND TUBE
The back of the lip plate is where the chin rests, so the distance between it and the tube influences both the way the headjoint feels to play and the direction of the air stream. A big space between the back of the lip plate and the tube tends to elevate and set up the airstream automatically. A small space between the back of the lip plate and the tube can help to angle the airstream more directly across the embouchure hole but also allows for more rolling in and out to find the perfect airstream direction.
The front of the lip plate is where the airstream travels after crossing the embouchure hole, so the distance between it and the tube influences the resistance and the response of the headjoint. When the front of the lip plate is further away from the tube it will feel more resistant due to the airstream having to travel across the top surface of the lip plate and then down the front. When the front of the lip plate is closer to the tube it will feel less resistant because the airstream has a direct path from the embouchure hole and then directly down the lip plate.
One thing of note is the space between the lip plate and the tube can be adjusted, on both the front and the back, and can be changed back to its original placement if needed. This is a safe way to experiment with what kind of spacing works best for your particular needs. Only see a professional technician for this alteration, as it can cause damage in the wrong hands.
LENGTH OF LIP PLATE
The length of the back of the lip plate determines how comfortable the headjoint is to play and doesn’t specifically affect the sound. A lip plate with a long back will feel noticeably different from one with a short back shape. There are no set rules on which is “better”; some players prefer the feel of a larger or longer lip plate, while others prefer the shape of a smaller lip plate.
The length of the front of the lip plate determines how the headjoint responds and affects articulation. A lip plate with a short front quickly disconnects the air stream as it moves past the edge of the lip plate, and while doing so adds some resistance to t
he articulation. A longer front lets the air move away naturally down the surface of the lip plate, making the headjoint feel more responsive and articulation quicker. Some players have noted that with a longer front lip plate they are able to control extreme pianissimo dynamics and tapers more easily.
CONTOUR OF LIP PLATE
The shape of the lip plate influences the way the air flows before and after crossing the embouchure hole as well as the responsiveness of the headjoint overall. For the back of the lip plate, a rounded and gently curved shape sets up the angle of the airstream, making it a suitable shape for a player that prefers a more forgiving setup. A steeply curved or nearly flat shape allows more freedom of movement to roll in and out to find the optimal airstream angle.
As for the front of the lip plate, the shape and steepness of it is one of the biggest determining factors of how responsive the headjoint will be. A rounded surface will add resistance as the airstream has to move across the embouchure hole, across the lip plate and then finally down the front of the lip plate. Alternatively, a steep or flat surface will remove resistance as the airstream moves across the embouchure hole and then nearly immediately drops down the front of the lip plate making for a remarkably quick response.
CUTTING THE HEADJOINT
Using a small collection of hand tools - a three sided cutting blade, a mirror on a stick, various files, sandpaper and a few different gages and measuring tools, material is removed from the riser and around the lip plate to give the headjoint its character. The process is slow and meticulous as the headjoint is cut, measured, shaped and tested until the headjoint sounds and feels just right.
THE RISER
The riser controls how much air goes into the tube, how that air moves through the tube, and how the headjoint responds overall. The riser is the area we are referring to when we say we are “cutting” the headjoint. Overcuts, undercuts, edges, size of the embouchure hole and the height of the riser all play crucial roles in how the headjoint feels, sounds and responds.
OVERCUTS
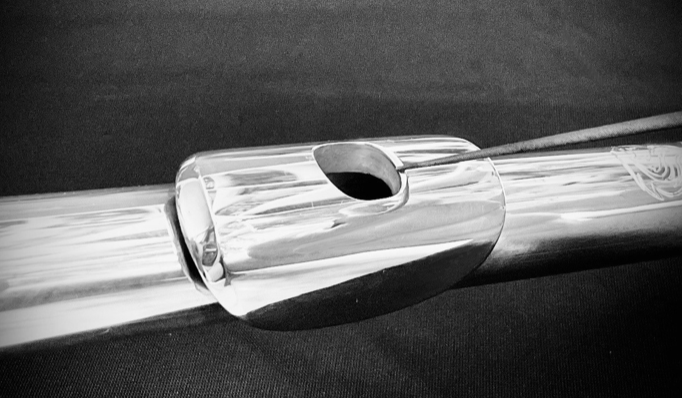
Overcuts (found at the top of the lip plate over the side walls) ease the airflow into the embouchure hole. Large overcuts gather more of the air into the riser and work great for players that need a headjoint that feels a bit less restrictive. Thinner overcuts channel less air into the embouchure hole, and work best for players who prefer a little bit more resistance. The size and depth of the overcuts influence how resistant the headjoint feels. Overcuts that blend deeper into the side walls will capture more air and draw it into the tube with more ease than overcuts that are only at the top of the riser. A round overcut will be more forgiving and feel more free-blowing than overcuts that are very edgy, angular or asymmetrical.
UNDERCUTS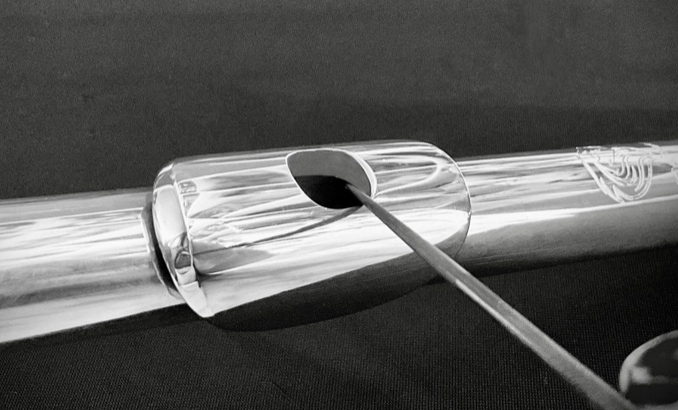
Undercuts (found at the bottom of the side walls) help to ease the air from the base of the riser into the tube. A thin undercut gently eases the air into the tube while maintaining the balance between the high and low registers. A thick undercut rapidly moves the air into the tube but the low register can be damaged if too much material is taken away here. Large undercut channels that start midway down the riser (as opposed to starting at the riser base) and blend outward into the tube move the air very rapidly and easily. Generally, the bigger the undercut is, the easier and more responsive the headjoint is to play. Regardless of the size of the undercut, it should be blended carefully so as to avoid any rough or sharp edges as these will change how the headjoint feels and responds in a negative way.
SHAPE OF THE RISER
The shape of the riser is the biggest determining factor in how easy or hard the headjoint will be to play. Risers typically are oval, rectangular or square; and each of these shapes work best when the interior shape conforms to a specific set of angles in relation to the lip plate. Typically the front wall should be flat and straight, curving gently into the side walls. The side walls should also be straight and flat, though more variety is allowed here for shaping in and out of overcuts and undercuts. The side walls should curve gently into the back wall. Like the front wall, the back wall should be straight and flat, though more leniency is allowed here because the back wall is not a wall with an airstream directed at it. All four walls should typically follow straight into the bottom of the riser, without curves or dips through the flat. Discrepancies in the angles or in the shape usually manifest themselves as a headjoint that sounds and feels unstable, doesn’t respond easily, and is uneven through the registers.
THE FRONT EDGE
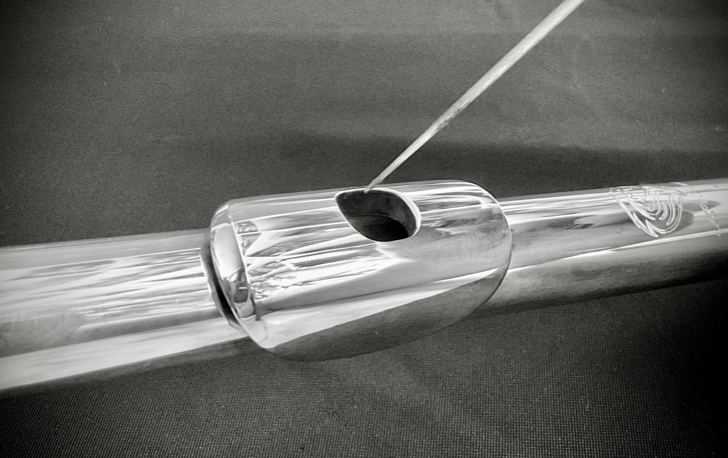
The sharpness of the front edge has the biggest influence on how clean the articulation will be. A mildly sharp front edge is ideal; an overly dull or rounded edge can make the headjoint feel sluggish and sound fuzzy. One must use caution though as too sharp an edge can introduce a “hiss” into the sound. To find the sweet spot, I typically cut my headjoint and then lightly break the front edge with a swipe of sandpaper or polishing cloth to cut it down. The back and side edges can be a bit more rounded and still respond nicely but care should be taken that they remain well defined.
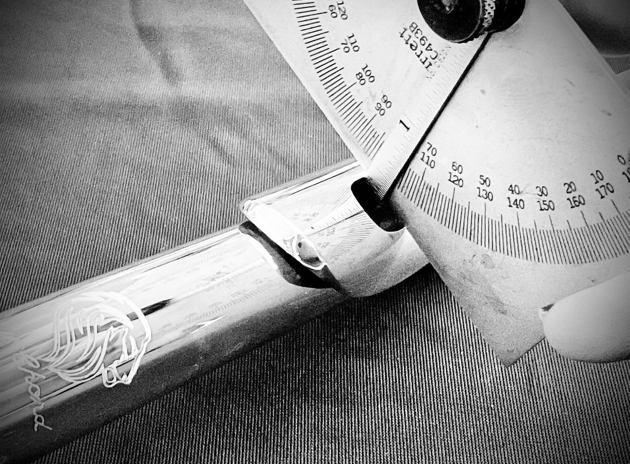
HEIGHT OF THE RISER
The height of the riser is the biggest determining factor in how resistant the headjoint will feel overall. A tall riser will feel more resistant because the air has further to travel before it gets into the tube. A short riser will feel less resistant because the air has less distance to travel before reaching the tube. While creating my line of headjoints I experimented with how far I could take the riser height and found that a very short wall feels very unstable to play while a very tall riser feels shockingly resistant.
SIZE OF THE EMBOUCHURE HOLE
The size of the embouchure hole determines how much air the headjoint can take. A large embouchure hole is great for those players that tend to use a lot of air or that tend to crack notes. The smaller embouchure hole is perfect for players that prefer a bit more control over the amount of air they use or want a bit more resistance. The front to back, side to side and diagonal measurements are all crucial in determining how much air the headjoint can take. An oversized embouchure hole will feel difficult to control while a too small embouchure hole will feel resistant and easily overpowered.
Once the headjoint is made it is tested thoroughly. I get out my orchestral excerpts and scales and work through the entire range of the headjoint, testing to see if it has any weak places or issues with colors, dynamics or articulation. The headjoint should play in tune and play evenly through all registers. If I find an issue with how it feels or sounds, I rework it until I’m completely happy with it. The overcuts, undercuts, shape of the riser, front edge and size of the embouchure hole can all be adjusted after the headjoint is made. A small adjustment to an angle, or a slightly more defined edge, or even a chatter mark removed from an undercut can completely change how the headjoint feels and sounds.
As you can see, each individual characteristic outlined here is just a small part of the whole picture. Different combinations of these physical characteristics build the overall sound and feel of the headjoint and there are an infinite number of combinations that are possible. There’s a headjoint with the perfect combination of features out there for every kind of flute player!
Lindsey McChord is a headjoint maker, hand engraver and flute repair specialist working with flutists across the USA and worldwide. She was previously the headjoint department manager and a flute finisher for Verne Q. Powell Flutes. She is the founder of McChord Flutes, offering boutique headjoint designs, custom hand engraving and professional flute repair.